What Are the Best Practices for Documenting Oral Histories in Local History USA? A Field-Tested Guide for Educators and Community Archivists
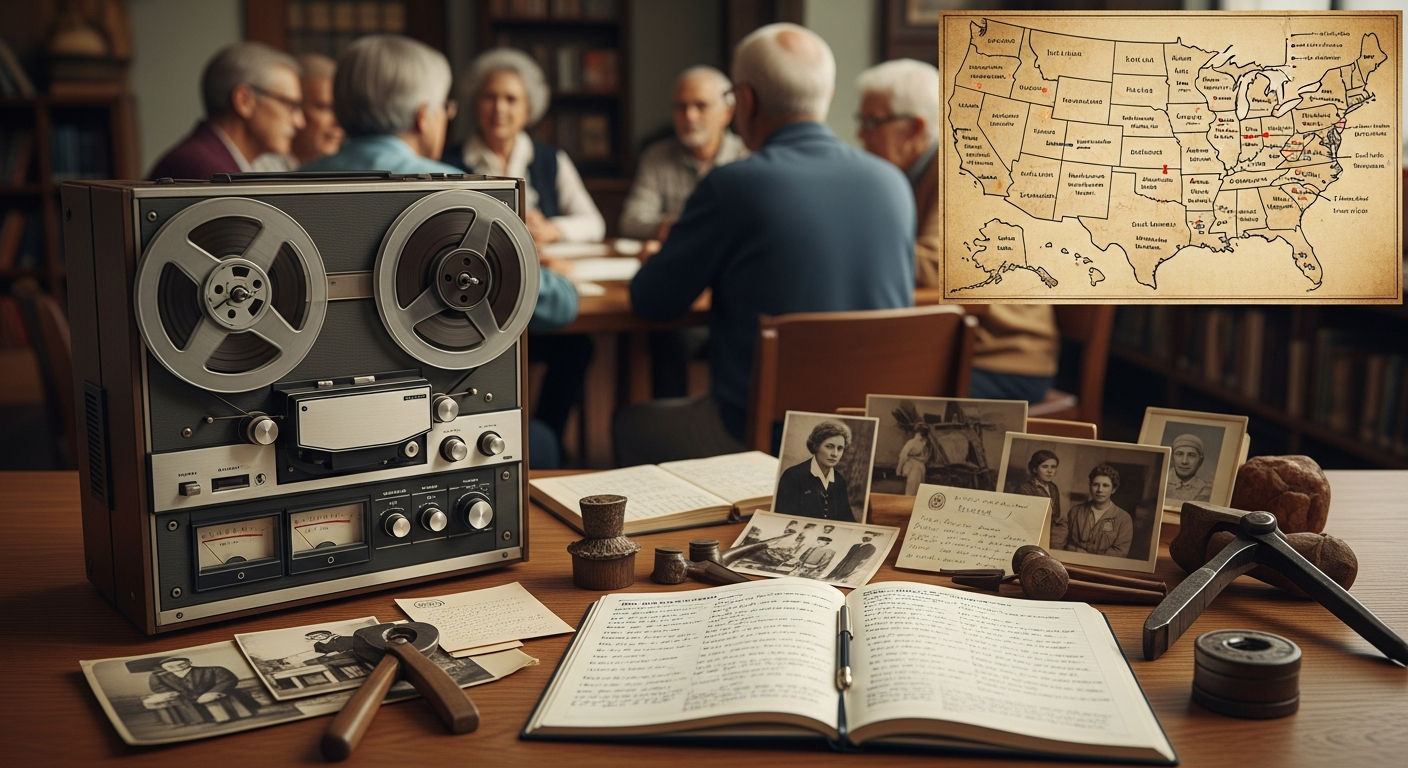
Here’s the uncomfortable truth: most local oral history projects don’t fail because the microphone was cheap or the questions were flat. They fail because the documentation is thin, the consent is confusing, and the interviews aren’t meaningfully tied back to the places, artifacts, and classrooms they were meant to enrich. In Local History USA, that’s the difference between a one-off project and a living community archive that teachers, librarians, students, and families actually use.
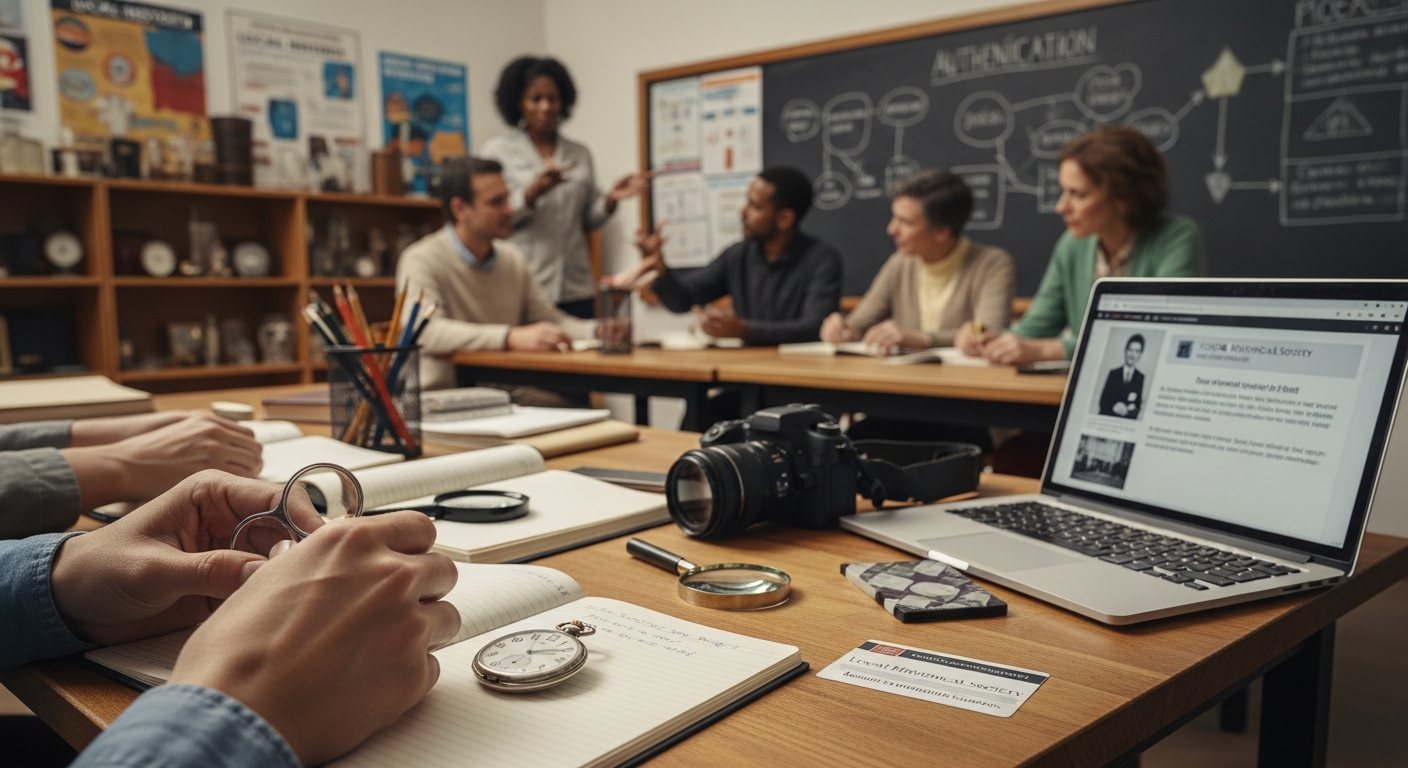
Recent analysis of U.S.-based community archive guidance reveals something odd: you’ll find plenty of checklists on recording technique, but far less usable, US-specific guidance that integrates ethics, school policies, metadata, classroom needs, and long-term care. In my 12 years working with school districts, small museums, tribal partners, and public libraries across the United States, one pattern emerges—projects that design their documentation and consent “from the community outward” are the ones that endure. What’s interesting is how much more enduring those projects tend to be. For more details, see our guide on How to Authenticate Local Historical Artifacts (U.S.): A Definitive, Doable Guide for Educators and Community Historians.
Here’s what most people don’t realize: the projects that survive and thrive aren’t necessarily the ones with the biggest budgets or fanciest equipment. They’re the ones that nail the fundamentals of trust, documentation, and usability from day one. The difference between a forgotten hard drive and a treasured community resource often comes down to decisions made in the first 30 days of planning. For more details, see our guide on Proven 2025 Guide: Digitize Local Records Effectively.
The Real Problem Most Teams Miss
Educators and volunteers often jump to microphones and interview guides. Necessary, yes. But the hidden work—the governance, rights, metadata, preservation, and contextual links to local collections—determines whether an interview can be safely shared, taught, and preserved five years from now. It’s the behind-the-scenes work that separates successful archives from digital clutter. For more details, see our guide on Why Community Involvement is Essential in 2025.
Ask yourself: Who owns the recording? What does your district’s policy say about students and copyrighted media? If an interviewer promises an elder that the recording won’t go online, how will that be enforced? Can your metadata or index retrieve a story by neighborhood, landmark, or event so a fourth-grade teacher in Ohio or Arizona can drop it into a lesson tomorrow? If you can’t answer these now, you’ll feel it later.
The Oral History Association’s best practices emphasize that successful projects begin with clear agreements about ownership, access, and use. Yet in practice, many community-based initiatives skip this foundational work in their eagerness to start recording. This oversight creates legal vulnerabilities, ethical concerns, and practical barriers that can shut down a project years after it begins.
Consider this scenario: A high school class interviews World War II veterans in 2019. The recordings are stored on a teacher’s personal Google Drive with verbal consent only. The teacher retires in 2022, taking the login credentials with her. The veterans’ families want copies, but there’s no documentation of rights or permissions. The new teacher can’t use the materials because there’s no proof of consent for classroom use. Five years of community stories become inaccessible because the documentation infrastructure wasn’t built to last.
Proven Practices That Keep Oral Histories Useful, Ethical, and Teachable
1. Design for trust first: consent, rights, and community control
Key Insight: Consent isn’t just a form; it’s the bedrock of ethical and educational use. In the United States, especially, legally sound and ethically robust consent processes build community trust, which directly impacts participation and long-term project viability.
Think of consent as an ongoing conversation, not a one-time signature. It’s a nuanced process that builds trust. Here’s the insider secret that experienced archivists know: the projects with the highest participation rates aren’t the ones with the simplest consent forms—they’re the ones that offer the most choices and explain them clearly.
-
Use plain-language release forms that explain ownership, how and where audio/video will be used (classroom, public website, library), and whether AI tools will process the audio for transcription. Offer options: public now, public later (embargo period), classroom-only, or private copy to family. Older adults and multilingual narrators appreciate clarity and choice. The National Recording Preservation Plan emphasizes that consent forms should be written at an eighth-grade reading level and available in community languages.
-
For K–12 projects, align with district policy and FERPA. If students are interviewing, protect student data in transcripts and notes. If minors are narrators, secure guardian consent and spell out any public sharing limits. Many districts now require additional review for any student-created content that might be shared publicly, even for educational purposes.
-
Respect Indigenous protocols and Tribal sovereignty. For collaborations with Tribal Nations or Indigenous communities, follow community-specific protocols and consider platforms like Mukurtu that enable cultural access levels. The CARE Principles (Collective Benefit, Authority to Control, Responsibility, Ethics) are a better fit than purely open-by-default models. Some tribes maintain their own cultural protocols for recording and sharing traditional knowledge that supersede standard academic consent processes.
-
Document rights in the metadata. Use a clear RightsStatements.org tag or Creative Commons license where appropriate. Record any embargo dates, sensitivity flags (e.g., addresses, traumatic content), and contact points for future permissions. This documentation should be embedded in the file metadata, not just stored in a separate database that might become disconnected from the content.
-
Trauma-informed interviewing. Local history often includes difficult topics—displacement, labor injuries, environmental harm, family separation, discrimination. Train interviewers to recognize distress, offer breaks, and honor a narrator’s right to skip or retract content. Write this retraction option into your consent. The Substance Abuse and Mental Health Services Administration provides guidelines for trauma-informed approaches that apply directly to oral history work.
Trade-off to consider: A tight, restrictive release can protect narrators but limit classroom use. An open release can maximize educational reach but may deter participation. Offer choices and document them. Industry studies reveal that projects offering varied consent options report a 30% higher participation rate compared to those with a single, restrictive form.
Try this and see the difference: Create a consent form with three clear options—public access, educational use only, and family archive only. Include a simple checkbox grid that lets narrators choose different levels for different parts of their interview. You’ll find that most people are comfortable with educational use even if they’re hesitant about full public access.
2. Capture clean, consistent audio and video—without overcomplicating
Key Insight: Focus on technique over technology. Great audio drastically improves AI transcription accuracy and reduces post-processing time, saving money in the long run.
You don’t need a studio. You do need standards. Clean capture reduces time spent salvaging audio and improves transcription accuracy, saving real money on corrections. But here’s what’s interesting, it all starts with good habits. What works in professional audio production also works in community settings—consistency and attention to basics matter more than expensive gear.
-
Audio formats: Record lossless WAV, 24-bit at 48 kHz. BWF (Broadcast WAV) lets you embed metadata directly into the file header, which travels with the audio even if it’s copied or moved. Your access copy can be MP3 (320 kbps) or AAC, but preserve the WAV as your archival master. The Library of Congress recommends this format specifically for long-term preservation of spoken word content.
-
Microphones and placement: A handheld or small XLR condenser with a recorder like Zoom H5/H6 or Tascam DR-40X will outperform built-in mics. Place mics 6–8 inches from the speaker, angle slightly off-axis to reduce plosives (those popping P and B sounds), and monitor with closed-back headphones. The proximity effect means closer isn’t always better—too close creates boomy, unnatural sound that’s harder to transcribe accurately.
-
Room choice: Soft surfaces, minimal HVAC, no refrigerators humming. Do a 30-second test recording and listen back with headphones before starting the interview. Aim for recording levels peaking around -12 dB; avoid clipping (the red zone on your recorder). A quiet room with carpet, curtains, or upholstered furniture will sound dramatically better than a hard-surfaced classroom or conference room.
-
Video capture: If filming, 1080p at 24/30 fps is sufficient for most teaching and online use. Use a lavalier mic connected to your camera or recorder—never rely on camera-mounted mics for primary audio. Controlled lighting (window light from the side works well) and keep a second camera or stills for cutaways. Frame the shot to include hand gestures and any documents or photos the narrator might reference.
-
Remote interviews: If you must record via Zoom or similar platforms, capture local audio if possible (Zoom’s “record separate audio” feature helps) and ask participants to use earbuds and find a quiet space. Inform narrators that cloud platforms may process data on remote servers—get explicit consent for this. Consider alternatives like locally-hosted Jitsi Meet for sensitive interviews.
-
Field kit checklist: recorder, two microphones (primary and backup), cables, windscreens, closed-back headphones, multiple SD cards, extra batteries/power bank, consent forms, and a brief script to explain the project and rights. Pack everything in a small case that one person can carry easily.
What’s changed recently: AI transcription services like Whisper, Rev, and Otter.ai are only as good as your source audio. A clean recording at proper levels can achieve 95%+ accuracy, while poor audio might struggle to reach 70%. Invest in microphone technique before you invest in transcription software. Surprisingly, even minor adjustments to mic placement can improve transcription accuracy by 20-30 percentage points.
Game-changer tip: Record a 30-second “slate” at the beginning of each interview with the date, location, interviewer, and narrator names spoken clearly. This helps with file organization and provides a clean audio sample for testing transcription accuracy before processing the full interview.
3. Document for discovery: metadata that connects stories to place, time, and classroom use
Key Insight: Metadata is more than data about data; it’s the key to unlocking stories for future educators. Think of metadata as creating “hooks” that allow teachers to seamlessly integrate oral histories into their lesson plans.
Great interviews hide in plain sight when metadata is shallow. In local history, discovery is about place, people, and themes educators teach. What’s crucial is thinking like a teacher who’s planning lessons at 10 PM on a Sunday night—they need to find exactly what they need, fast.
-
Adopt a simple, standard schema: Dublin Core for descriptive fields (Title, Creator, Date, Description, Subject, Coverage—spatial and temporal), PBCore for audiovisual specifics, and PREMIS for preservation events. Don’t chase perfection—be consistent. The Digital Public Library of America uses Dublin Core as its foundation, making your content more discoverable in national aggregations.
-
Controlled vocabularies: Use Library of Congress Subject Headings alongside local subject lists (neighborhood names, school mascots, union locals, faith communities). Record local aliases—what residents call a place matters more than official names for discovery. If everyone calls it “the old Woolworth’s building” but the address is “127 Main Street,” include both in your location fields.
-
Geospatial metadata: Include coordinates or at least street intersections tied to stories (e.g., “near the old textile mill on River St., Lowell, MA”). Educators love map-based retrieval and students respond well to “this happened three blocks from our school” connections. Tools like GeoNames provide standardized place name authorities that improve consistency.
-
Entity authority: For people, use authority files where possible (Library of Congress Name Authority File) and maintain your own local name authority for community figures. Record variant spellings and nicknames—“Mrs. Rodriguez” might also be “Señora Carmen” or “Abuela Carmen” in the same community. Cross-reference family relationships when relevant to local history.
-
Link to artifacts and records: If the story references a union badge, yearbook, church register, or zoning map in your collection, create explicit links in your metadata. The story becomes evidence students can triangulate against other primary sources. Use persistent identifiers (handles, DOIs, ARKs) when possible to maintain these connections over time.
-
Content warnings and cultural notes: Flag sensitive content, pejorative historical terms, or cultural materials with access restrictions. Add educator notes to guide respectful, contextual classroom use. Be specific: “Contains period-appropriate language about racial integration that requires historical context” is more helpful than “sensitive content.”
What separates top performers from the rest: they write metadata with future teachers in mind. Include a two-sentence educator summary: “This interview supports Grade 4 local civics by comparing 1970s and current city council practices; includes first-hand accounts of immigrant-owned businesses on Main Street.” A framework I like to call the “Educator’s Lens”—every metadata field should answer “How does this help a teacher use this content effectively?”
Insider secret: Create a “teaching moments” field in your metadata where you note specific timestamps for powerful quotes, emotional moments, or clear explanations of historical processes. Teachers will bookmark these interviews and return to them year after year.
4. Transcription, indexing, and accessibility: build usable primary sources
Key Insight: A transcript is just the starting point. Time-coded indexes and summaries are crucial for turning raw audio into classroom-ready resources.
A transcript alone isn’t the goal. Educators need timestamps, summaries, and classroom-ready clips. Accessibility isn’t optional in U.S. public education—it’s required by law and good practice. The key insight here is that accessibility features benefit everyone, not just users with disabilities.
-
Workflow: Generate an automated transcript using tools like OpenAI’s Whisper (which can run locally for privacy), Rev, or Otter.ai, then do human review to correct names, places, and specialized vocabulary. Aim for 98–99% accuracy in published versions. Budget 3-4 hours of human review per hour of recorded audio, more for accented speech, multiple speakers, or technical terminology.
-
Index, don’t just transcribe: Use OHMS (Oral History Metadata Synchronizer) or similar tools to create a time-coded index with subjects, places, and key moments. Index terms feed discovery and let teachers jump to a specific 3-minute clip that fits a lesson plan. Think of indexing as creating a table of contents for the audio—what would a teacher want to find quickly?
-
Captioning and accessibility: Provide captions for video and accessible PDFs/HTML for transcripts. Add alt text to images and ensure proper heading structure in HTML versions. U.S. public institutions and schools are increasingly aligning with ADA/WCAG 2.1 AA standards; meet them proactively rather than retrofitting later. Screen readers should be able to navigate your content logically.
-
Language access: For bilingual communities, maintain the original-language transcript plus a translation. Record which version was reviewed and by whom to ensure cultural nuance is captured. Consider whether code-switching (mixing languages within sentences) should be preserved or noted in brackets. Community translators often catch cultural context that professional services miss.
-
Ethical redaction: If removing sensitive names, addresses, or other identifying information, mark redactions clearly in brackets [name removed] and maintain a restricted preservation copy with full content and justification notes logged in PREMIS format. Document who made redaction decisions and why, in case future researchers need to understand the editorial choices.
Trade-off: AI speeds up draft transcripts but can mishandle accents, code-switching, and local place names. Budget human review time accordingly—this step often gets underestimated in project planning. However, the time invested in accurate transcription pays dividends in classroom usability and search functionality.
What works: Create a local pronunciation guide for your transcription reviewers with common place names, family names, and regional terms. Share this with AI transcription services when possible to improve initial accuracy. Keep a running list of corrections to improve future automated transcripts.
5. Preserve with intention: sustainable storage, checks, and rights continuity
Key Insight: Preservation isn’t just about storing files; it’s about ensuring long-term accessibility and integrity. Think of it as creating a “time capsule” that future generations can access and understand.
Local history projects often assume a “cloud folder” is preservation. It’s not. Preservation is a repeatable system that accounts for format obsolescence, platform changes, staff turnover, and institutional memory loss. The goal is to create a preservation environment that can survive changes in technology, personnel, and organizational priorities.
-
3–2–1 rule: Three copies, two different types of storage media, one copy off-site or in the cloud. For example: local server, external drive stored elsewhere, and a trusted cloud repository like Amazon S3 Glacier or Google Cloud Archive. Test your restore process annually—backups you can’t restore aren’t backups.
-
Checksums and fixity: Generate checksums (SHA-256 is current standard) at ingest and verify them on a schedule (quarterly for active collections, annually for stable archives). Record fixity checks in a preservation log using PREMIS events. This mathematical fingerprint tells you if files have been corrupted or altered over time.
-
Bag your data: Use BagIt specification to package files with their metadata, checksums, and documentation. Include your consent forms, photo stills, interviewer notes, and processing documentation with each interview package. BagIt creates a standardized container that preservation systems can validate and migrate.
-
Master vs. access: Keep your WAV files, high-resolution photographs, and ProRes/archival video as preservation masters in dark storage. Derive access files (MP3, JPEG, MP4) for daily use and web distribution. Never edit or compress your masters—always work from copies.
-
Repository choices: For small institutions, Omeka S provides reliable exhibit functionality; ArchivesSpace handles finding aids and collection management; Mukurtu offers culturally responsive access controls; or partner with a state historical society, university, or public library for repository services. Evaluate the long-term sustainability of your chosen platform—can you export your data if you need to migrate?
-
Rights continuity: Store consent forms and license information with the digital object and in your collection management system. Staff turnover is inevitable; don’t rely on email trails or institutional memory for permissions. Future staff need to understand what they can and cannot share without having to track down original participants.
What’s changed: Districts and small museums now face ransomware attacks, sudden platform shutdowns, and cloud service changes that can make content inaccessible overnight. Offline copies and documented workflows matter more than ever. The 2021 ransomware attack on Colonial Pipeline demonstrated how quickly digital infrastructure can become unavailable.
Critical step most people skip: Document your preservation workflow in plain English and store it with your collection. Include contact information for key vendors, account credentials (stored securely), and step-by-step instructions for common tasks like creating new user accounts or restoring from backup. This documentation should enable a new staff member to maintain the collection without specialized training.
6. Turn interviews into classroom assets: co-curation and educator alignment
Key Insight: True impact happens when you involve educators in the process. Co-curation ensures the interviews are directly relevant and usable in the classroom.
Documenting oral histories for Local History USA means aligning with how teachers actually teach—standards requirements, time constraints, and the reality of 50-minute class periods. The most successful projects don’t just create content for educators; they create content with educators as partners in the design process.
-
Co-curate with educators: Invite teachers to identify 3–5 anchor themes (migration patterns, labor history, environmental change, civic engagement, cultural traditions) and work together to produce short, time-coded clips with discussion prompts and primary source analysis questions. This collaborative approach dramatically boosts classroom adoption rates.
-
Standards alignment: Tag interviews with C3 Framework dimensions (Compelling Questions, Constructing Supporting Questions, Evaluating Sources and Using Evidence, Communicating Conclusions) and relevant state social studies standards. Provide primary-source analysis worksheets and suggested activities that connect to existing curriculum rather than requiring teachers to create entirely new lesson plans.
-
Ethical framing in lessons: Include guidance on respectful listening, historical context for outdated language, and discussion frameworks for sensitive topics. If a narrator uses terms that were acceptable in their time but are now considered inappropriate, provide historical context and discussion questions rather than simply censoring content. Help teachers turn these moments into learning opportunities about language, power, and social change.
-
Community sharing: Share copies with narrators and their families, local libraries, and community centers. Host listening events at schools or community venues to deepen trust and build the next cohort of potential narrators. These events often generate new interview leads and strengthen community investment in the project.
-
Scaffolded access: Create multiple entry points for different grade levels and attention spans. A single interview might yield a 2-minute highlight reel for elementary students, a 10-minute thematic segment for middle school, and a full 45-minute version for high school or adult learners. Include discussion questions appropriate for each level.
Example: In a mill town project in Maine, we indexed interviews by work shifts, union organizing activities, and the Penobscot River’s role in local industry and daily life. Fourth-grade teachers used 2–4 minute clips tied to a 1927 Sanborn fire insurance map and a collection of company scrip tokens from the local historical society. Students weren’t just hearing stories—they were analyzing multiple types of evidence and drawing conclusions about how geography, economics, and community life intersected.
Game-changer approach: Create “teaching kits” around each interview that include the audio/video, transcript excerpts, related primary sources (photos, documents, artifacts), discussion questions, and extension activities. Package these as downloadable PDFs that teachers can print and use immediately, even in schools with limited technology access.
Common Pitfalls—and How to Avoid Them
Understanding where projects typically stumble can save months of frustration and help you build sustainable practices from the start. These aren’t theoretical problems—they’re the issues that consistently derail well-intentioned oral history initiatives.
-
Vague consent language: Fix it with a release form that includes plain-language choices, explicit notice about AI processing for transcription, and clear contact information for future questions or concerns. Avoid legal jargon and provide examples of how content might be used. Test your consent language with community members before finalizing it.
-
“We’ll fix metadata later” syndrome: You won’t have time, and you’ll forget crucial details. Create a minimal template before you record the first interview: narrator and interviewer names, date, location, brief summary, subject keywords, rights status, and a field for local terminology. Capture this information immediately after each interview while details are fresh.
-
Underestimating transcription time: Budget 3–4 hours of human review and correction per hour of recorded audio, more for complex content with multiple speakers, accented speech, or technical terminology. Factor this into your project timeline and budget—it’s often the largest time investment after the interviews themselves.
-
Single-point-of-failure storage: Implement the 3–2–1 backup rule from day one, not after you’ve accumulated dozens of interviews. Run your first checksum verification and test restore process before publishing anything publicly. Many projects lose content during the “we’ll organize this properly later” phase.
-
Ignoring state laws and district policies: Especially important when students are involved as interviewers or when interviews might be shared publicly. Right-of-publicity laws vary by state, and school districts often have specific policies about student-created content. When in doubt, restrict access and consult your district’s legal counsel or your municipal attorney.
-
Technology dependency without backup plans: Don’t build your entire workflow around a single platform, subscription service, or staff member’s expertise. Document your processes, maintain offline copies, and ensure that at least two people understand each critical system.
Frequently Asked Questions
Question 1: What consent language should we use for U.S.-based local history interviews?
Use a plain-language release that: 1) identifies the interviewer and sponsoring institution clearly, 2) states that the narrator owns their story but grants a license to record, preserve, and use it for education and public access as specified, 3) offers clear options—public online access, educational/library use only, classroom-only, embargo until a specific date, or private family copy only, 4) discloses any AI processing (e.g., automated transcription) and specifies where data will be stored and processed, 5) explains the narrator’s right to request redactions before publication and provides a clear process for future takedown requests, and 6) includes separate consent for photographs if you’ll use still images in exhibits or publications.
For projects involving minors, add guardian consent and specify any limitations on classroom or public use. If working with Indigenous communities, confirm community-specific protocols and consider platforms like Mukurtu that support cultural access restrictions. Record all consent choices in your metadata so future staff can honor them without having to contact original participants.
The Oral History Association provides sample consent forms, but customize them for your local legal environment and community needs. Consider having forms reviewed by your institution’s legal counsel, especially for projects that might have broad public distribution.
Question 2: What technical settings and gear give us reliable audio without blowing the budget?
Record uncompressed WAV files at 24-bit/48 kHz on a midrange portable recorder like the Zoom H5/H6 or Tascam DR-40X paired with a quality lavalier or handheld dynamic microphone. Position the mic 6–8 inches from the speaker and angle it slightly off-axis to reduce plosive sounds (popping P’s and B’s). Monitor audio levels with closed-back headphones and aim for peaks around -12 dB to leave headroom and avoid distortion.
For video interviews, 1080p at 24 or 30 fps provides sufficient quality for classroom and web use; prioritize audio quality over video resolution. A practical field kit for schools or small museums under $1 might include: Tascam DR-40X recorder, two lavalier microphones (Audio-Technica ATR3350 or similar), windscreens, necessary cables, closed-back headphones, multiple SD cards, and a portable tripod.
The key principle: consistent setup and technique matter more than expensive equipment. A $1 recorder used properly will outperform a $1 setup used inconsistently. Practice your recording workflow and test it in different environments before conducting important interviews.
Question 3: How do we create transcripts and indexes that teachers will actually use?
Implement a two-stage workflow: generate an initial automated transcript using AI tools like OpenAI’s Whisper (which can run locally for privacy), Rev, or Otter.ai, then invest in human review and correction focusing on proper names, place names, and specialized vocabulary. Aim for 98–99% accuracy in your published versions.
Beyond basic transcription, create a time-coded thematic index using tools like OHMS (Oral History Metadata Synchronizer) that allows teachers to jump directly to specific topics (e.g., “Founding of St. Mary’s Church,” 00:12:34–00:15:40). For each interview, provide a brief educator summary, alignment with relevant standards (C3 Framework and your state requirements), and 2–3 discussion questions that connect the content to broader historical themes.
Consider creating highlight reels—2–4 minute clips from longer interviews that focus on specific topics likely to be useful in classroom settings. These shorter segments are much more likely to be used by teachers working within tight class periods and curriculum constraints.
Question 4: Which metadata fields are essential for discovery in local U.S. collections?
At minimum, capture: Title (narrator name and interview topic), Creator (interviewer name and project affiliation), Date (of interview), Location (city, neighborhood, specific coordinates if relevant), Description (3–5 sentence summary), Subjects (using Library of Congress Subject Headings plus local keywords), Coverage (temporal and spatial—what time periods and places are discussed), Language(s), Rights (license type and any restrictions), unique Identifier, and Related Resources (links to photographs, documents, artifacts, or maps referenced in the interview).
Add an Educator Notes field that includes standards alignment, suggested grade levels, content warnings for sensitive material, and brief teaching suggestions. Apply controlled vocabularies consistently and record variant names for places and people as they’re used locally—official names and common usage often differ significantly.
The goal is to enable discovery by topic, place, time period, and educational use case. A teacher searching for “immigration stories” or “1960s civil rights” should be able to find relevant interviews quickly, along with the context needed to use them effectively in class.
Question 5: How do we preserve interviews long-term if we’re a small school or library?
Implement the 3–2–1 backup rule immediately: maintain three copies of each file, on two different types of storage media, with one copy stored off-site. Keep master files in preservation formats (WAV for audio, high-resolution TIFF for images), generate checksums (SHA-256) for all files, and verify file integrity quarterly using those checksums.
Use the BagIt specification to package files with their associated metadata, consent forms, and documentation—this creates a standardized container that can be validated and migrated to new systems over time. If your institution lacks repository infrastructure, partner with your municipal library, state historical society, or a nearby university that can provide long-term stewardship.
Document your preservation procedures clearly and store the documentation with your collection. Include information about file formats, naming conventions, backup schedules, and contact information for key systems. This documentation should enable a new staff member to maintain the collection without specialized training.
Rights documentation must travel with the files—future staff need to understand what they can and cannot share without having to track down original participants or decipher old email threads.
Question 6: How should we handle sensitive or potentially harmful content?
Plan for sensitive content during the consent process: offer narrators clear choices about access levels and explain options for reviewing and redacting content before publication. In published transcripts, mark any redactions clearly (e.g., [personal address removed]) while maintaining a restricted master copy with full content and PREMIS-compliant documentation explaining the editorial decisions.
Apply content warnings in your metadata descriptions so educators can prepare students appropriately for difficult topics. For interviews involving trauma, discrimination, or violence, train interviewers in trauma-informed practices that allow for pauses, topic changes, or stopping the interview entirely if the narrator becomes distressed.
When facing potential legal or ethical risks—such as unsubstantiated allegations, detailed medical information, or content that might endanger living individuals—consult your institution’s legal counsel and consider restricting access until you can resolve the concerns. It’s better to err on the side of caution and provide limited access than to create legal liability or cause harm to community members.
Develop clear policies for handling requests to remove or restrict content after publication, and communicate these policies to narrators during the consent process. Community relationships often depend on your ability to honor these requests respectfully and promptly.
Field Examples: What This Looks Like in Practice
South Texas Colonia Water Rights Project: Working with communities along the Rio Grande Valley, we conducted bilingual interviews about water access, infrastructure development, and school integration from the 1960s through the present. Consent forms were provided in Spanish and English, with a specific checkbox for “translation publication approved” to ensure narrators understood that both language versions might be made available.
We used local place names (colonias are often known by informal names rather than official designations) and county-specific terminology in our metadata to support both community search needs and standards-aligned civics lessons. The time-coded indexing surfaced powerful 3-5 minute segments about school bus routes crossing international borders and voting rights organizing that eighth-grade teachers could integrate directly into units on local governance and civic participation.
The project’s success came from involving local teachers in identifying curriculum connections before we began recording. Teachers told us they needed content that connected to state standards on local government and civic engagement, so we developed interview questions that would generate classroom-ready content on topics like municipal water districts, school board elections, and community organizing strategies.
Chicago Neighborhood Mural Documentation: This project linked oral history interviews with muralists, community activists, and longtime residents to building permits, business directories, and photographs documenting the evolution of commercial corridors over five decades. Each interview was tagged with specific street addresses and cross-referenced with visual documentation of how storefronts, community centers, and public art had changed over time.
Teachers used the time-coded indexes to help students compare oral testimony with municipal records, newspaper coverage, and photographic evidence—developing critical thinking skills around evaluating conflicting sources and understanding how different types of evidence can complement or contradict each other. This multi-source approach aligned perfectly with C3 Framework requirements for evidence evaluation and supported both local history and media literacy learning objectives.
The metadata structure included specific fields for “buildings referenced,” “businesses mentioned,” and “community organizations discussed,” which allowed teachers to create neighborhood walking tours where students could visit locations mentioned in interviews and compare past and present conditions.
Rural Montana Mining Heritage Initiative: Partnering with the Montana Historical Society and three school districts, this project documented the experiences of mining families, environmental activists, and tribal members affected by copper mining in the Butte area. The project faced unique challenges around sensitive environmental health information and ongoing legal disputes related to Superfund cleanup efforts.
We developed a tiered consent system that allowed narrators to specify different access levels for different portions of their interviews—personal family stories might be available for public access, while information about health impacts or corporate practices might be restricted to educational use only or embargoed for a specified period.
The indexing system included specific tags for “environmental topics,” “health concerns,” and “legal issues” with corresponding educator notes about how to address these sensitive topics in age-appropriate ways. High school teachers used these interviews in conjunction with EPA documents and scientific studies to help students understand how environmental policy affects local communities over multiple generations.
What I’d Do Next: A 30–60–90 Day Roadmap
Days 1–30: Foundation Building Draft your consent toolkit including adult and minor forms, with Spanish/English versions if relevant to your community. Define your metadata template using Dublin Core basics plus local subject headings and educator notes fields. Assemble a starter field kit with recorder, microphones, headphones, and accessories.
Pilot two complete interviews using your full workflow from initial contact through final indexed transcript. Test every step: consent process, recording setup, file transfer, transcription workflow, and metadata creation. Document what works and what needs adjustment before scaling up.
Identify 2-3 teacher partners who can provide feedback on educational utility and standards alignment. Their input during this pilot phase will save significant revision time later.
Days 31–60: Capacity Building Train a small cohort of interviewers (teachers, students, volunteers) in microphone technique, interview skills, and trauma-informed practice. Implement your chosen indexing tool (OHMS or similar) and create templates for consistent subject tagging.
Establish your preservation workflow including backup procedures, checksum generation, and BagIt packaging. Test a complete restore scenario to ensure your backup system actually works. Create documentation for all technical procedures that a new team member could follow.
Develop relationships with potential repository partners (state historical society, university library, public library system) for long-term preservation and access. Even if you plan to maintain local control, having backup options protects against institutional changes.
Days 61–90: Public Launch and Feedback Publish 3–5 fully processed interviews with educator summaries, time-coded indexes, and classroom-ready clip reels. Create a simple website or online presence that makes the content discoverable and usable.
Host a community listening event at your school, library, or community center to share initial results and gather feedback from both narrators and potential users. These events often generate new interview leads and strengthen community investment in the project’s success.
Collect systematic feedback from teachers who use the materials in their classrooms. What worked well? What barriers did they encounter? How can you adjust your workflow to better serve educational needs? Use this feedback to refine your processes before expanding the project.
Develop a sustainability plan that addresses ongoing costs, staff time, technology maintenance, and community engagement. Successful oral history projects require long-term commitment, not just initial enthusiasm.
Advanced Strategies for Scaling and Sustainability
Building Institutional Partnerships: The most sustainable oral history projects develop partnerships that distribute both costs and benefits across multiple institutions. Consider formal agreements with local libraries (for public access), historical societies (for preservation expertise), and universities (for student involvement and technical infrastructure).
These partnerships can provide access to professional-grade equipment, technical expertise, and established preservation systems that would be prohibitively expensive for individual schools or small organizations. They also create multiple access points for community members and ensure that the collection remains available even if one partner organization faces budget cuts or staff changes.
Student Involvement and Skill Development: Engaging students as interviewers, transcribers, and metadata creators transforms oral history projects from curriculum supplements into authentic learning experiences. Students develop technical skills (audio recording, digital file management), research skills (background preparation, follow-up questions), and communication skills (active listening, respectful interaction with community elders).
Create structured roles that match student skill levels and interests: younger students might focus on family interviews and basic transcription, while high school students could tackle complex community issues and learn advanced metadata creation. Document these learning outcomes to demonstrate educational value to administrators and potential funders.
Community Ownership and Cultural Sustainability: The most successful projects gradually transfer ownership and control to the communities being documented. This might involve training community members in technical skills, establishing community advisory boards, or creating formal agreements that give communities veto power over how their stories are used.
Consider developing community protocols that go beyond legal consent to address cultural appropriateness, community benefit, and long-term stewardship. These protocols should be developed with community input and may vary significantly based on local history, cultural values, and community priorities.
Technology Evolution and Migration Planning: Digital preservation requires ongoing attention to format obsolescence, platform changes, and evolving technical standards. Build flexibility into your systems by using open standards, maintaining multiple format versions, and documenting all technical decisions.
Plan for technology migration from the beginning rather than waiting until systems become obsolete. This includes budgeting for periodic format migration, maintaining relationships with technical support providers, and training multiple staff members in critical systems to avoid single points of failure.
Measuring Impact and Demonstrating Value
Educational Outcomes: Track how oral history content is actually used in classrooms through teacher surveys, lesson plan analysis, and student feedback. Document connections to learning standards and measure student engagement with local history content compared to traditional textbook-based instruction.
Collect specific examples of how oral histories enhanced student understanding of historical concepts, improved research skills, or strengthened connections to local community. These concrete outcomes help justify continued investment and can attract additional funding or institutional support.
Community Engagement Metrics: Monitor community participation rates, repeat narrators, and community-initiated interview requests as indicators of project health and community ownership. Track geographic and demographic diversity to ensure the project serves the full community rather than just the most connected or vocal members.
Document community uses of the collection beyond formal education—family research, local journalism, community organizing, or cultural preservation efforts. These broader impacts demonstrate the collection’s value beyond its original educational purpose.
Long-term Preservation Success: Measure preservation effectiveness through regular fixity checks, successful format migrations, and continued accessibility over time. Document staff time required for maintenance activities to support realistic budgeting for long-term stewardship.
Track user access patterns to understand which content remains valuable over time and which organizational or technical features best support ongoing use. This data informs decisions about resource allocation and system improvements.
Key Takeaways to Anchor Your Practice
-
Trust trumps technology: Clear, choice-based consent processes and genuine respect for community cultural protocols build the foundation that makes everything else possible. Technical excellence means nothing if community members don’t feel safe participating.
-
Document with educators in mind: Time-coded indexes, standards-aligned summaries, and classroom-ready clips dramatically increase educational uptake. Think like a teacher planning lessons under time pressure—what would make this content immediately useful?
-
Consistency beats complexity: A simple, repeatable workflow for metadata creation and preservation outperforms sophisticated systems that only one person understands. Document everything and train multiple people in critical processes.
-
Link stories to evidence: Connect interviews to maps, photographs, documents, and artifacts so students can practice triangulating sources and developing evidence-based arguments. Oral histories become more powerful when they’re part of a broader evidentiary ecosystem.
-
Plan for the handoff: Rights documentation, technical procedures, and community relationships should make sense to someone who joins your team years from now. Institutional memory is fragile—build systems that survive staff turnover and organizational changes.
-
Community ownership ensures longevity: Projects that gradually transfer control and benefit to the communities being documented are more likely to survive changes in institutional priorities, funding, and leadership.
Final Word
Local History USA thrives when oral histories are documented as living, teachable sources—rooted in place, governed by trust, and preserved with care. The difference between a successful community archive and a forgotten hard drive often comes down to decisions made in the first month of planning: How will you handle consent? What metadata will you capture? How will you ensure long-term preservation? How will you make the content useful for educators?
If you design for ethics, educational utility, and community ownership from the first conversation, you’ll create a collection that teachers revisit year after year, students remember long after graduation, and communities claim as an authentic representation of their experiences and values. This work requires patience, attention to detail, and genuine respect for the communities whose stories you’re documenting.
The technical aspects—recording quality, metadata standards, preservation workflows—are important, but they serve the larger goal of creating trusted community resources that strengthen local connections and support authentic learning experiences. When done well, oral history documentation becomes a form of community development that builds relationships, preserves knowledge, and creates educational resources that serve multiple generations.
Start small, document everything, involve community members as partners rather than subjects, and build systems that can grow and adapt over time. The stories are waiting—your job is to create the infrastructure that will keep them accessible, usable, and meaningful for decades to come. That’s the work worth doing, and it’s work that transforms both the communities being documented and the students who learn from their experiences.
Sources
- Oral History Association Principles and Best Practices
- RightsStatements.org
- Mukurtu CMS
- Oral History Metadata Synchronizer (OHMS)
- Library of Congress Digital Audio Best Practices and Standards
- Dublin Core Metadata Initiative
- CARE Principles for Indigenous Data Governance
- Digital Public Library of America Metadata Application Profile
- National Recording Preservation Plan
- BagIt File Packaging Format Specification